Playbooks start with a Trigger action and end with an End action. In between, you can create any of the following actions:
Action Name |
Description |
When to Use/How to Use |
|---|---|---|
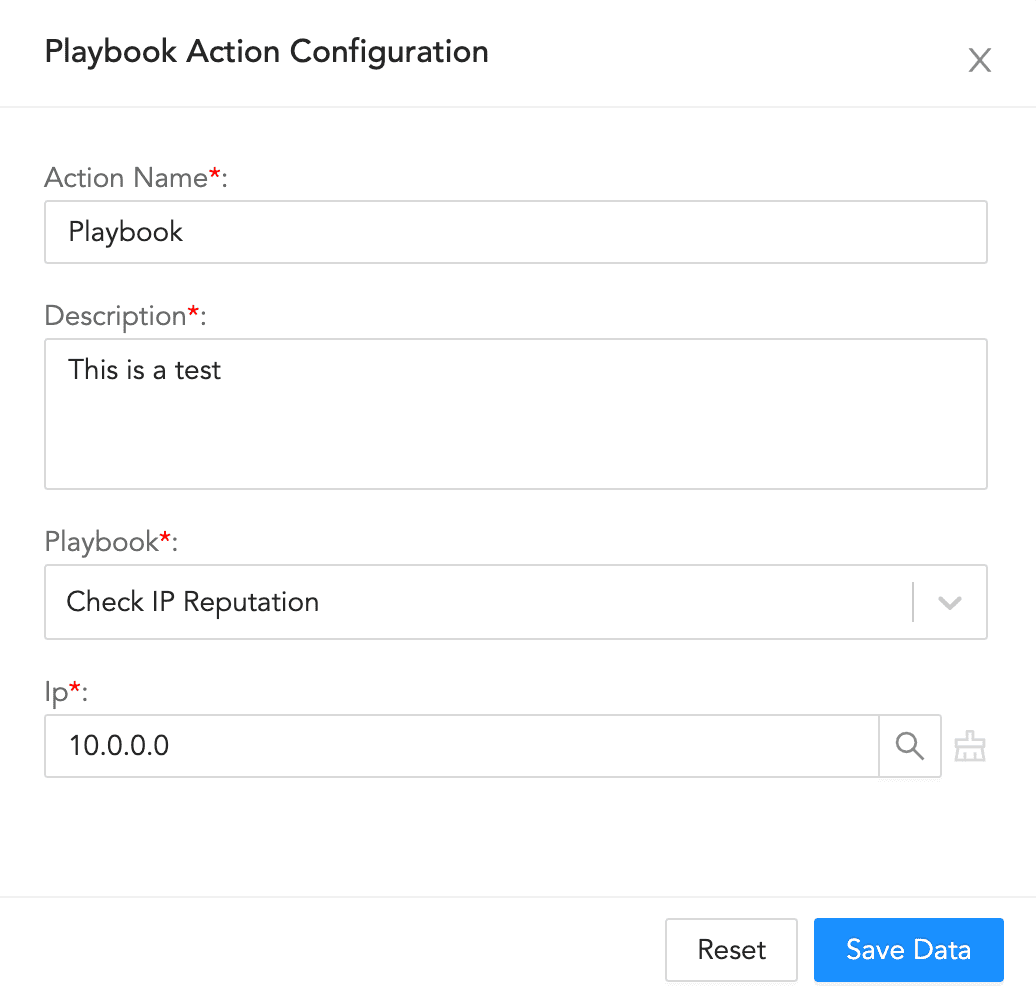
Playbook |
Triggers a different playbook from within the current or parent playbook. |
For longer processes that playbooks automate, it can be helpful to break up the processes into parts. This will help you reuse different playbooks in different scenarios. |
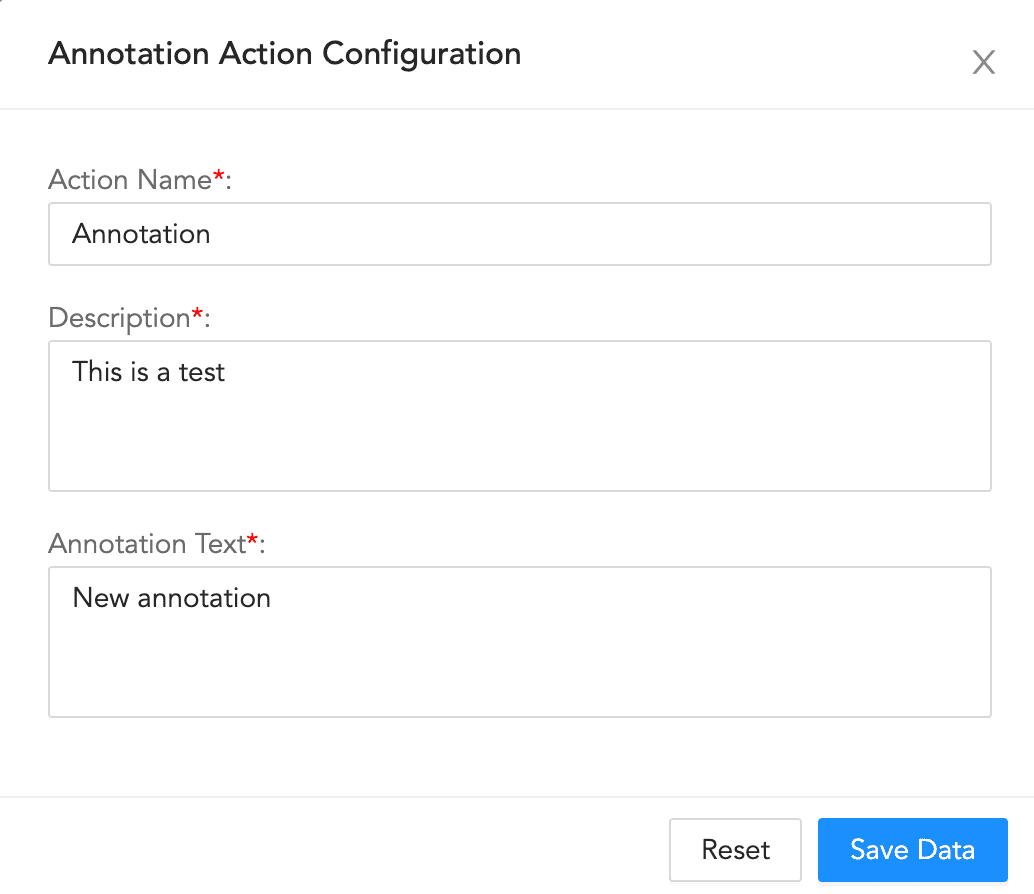
Annotation |
Adds comments to a playbook action. |
Let your colleagues know important information about the Action and Playbook. |
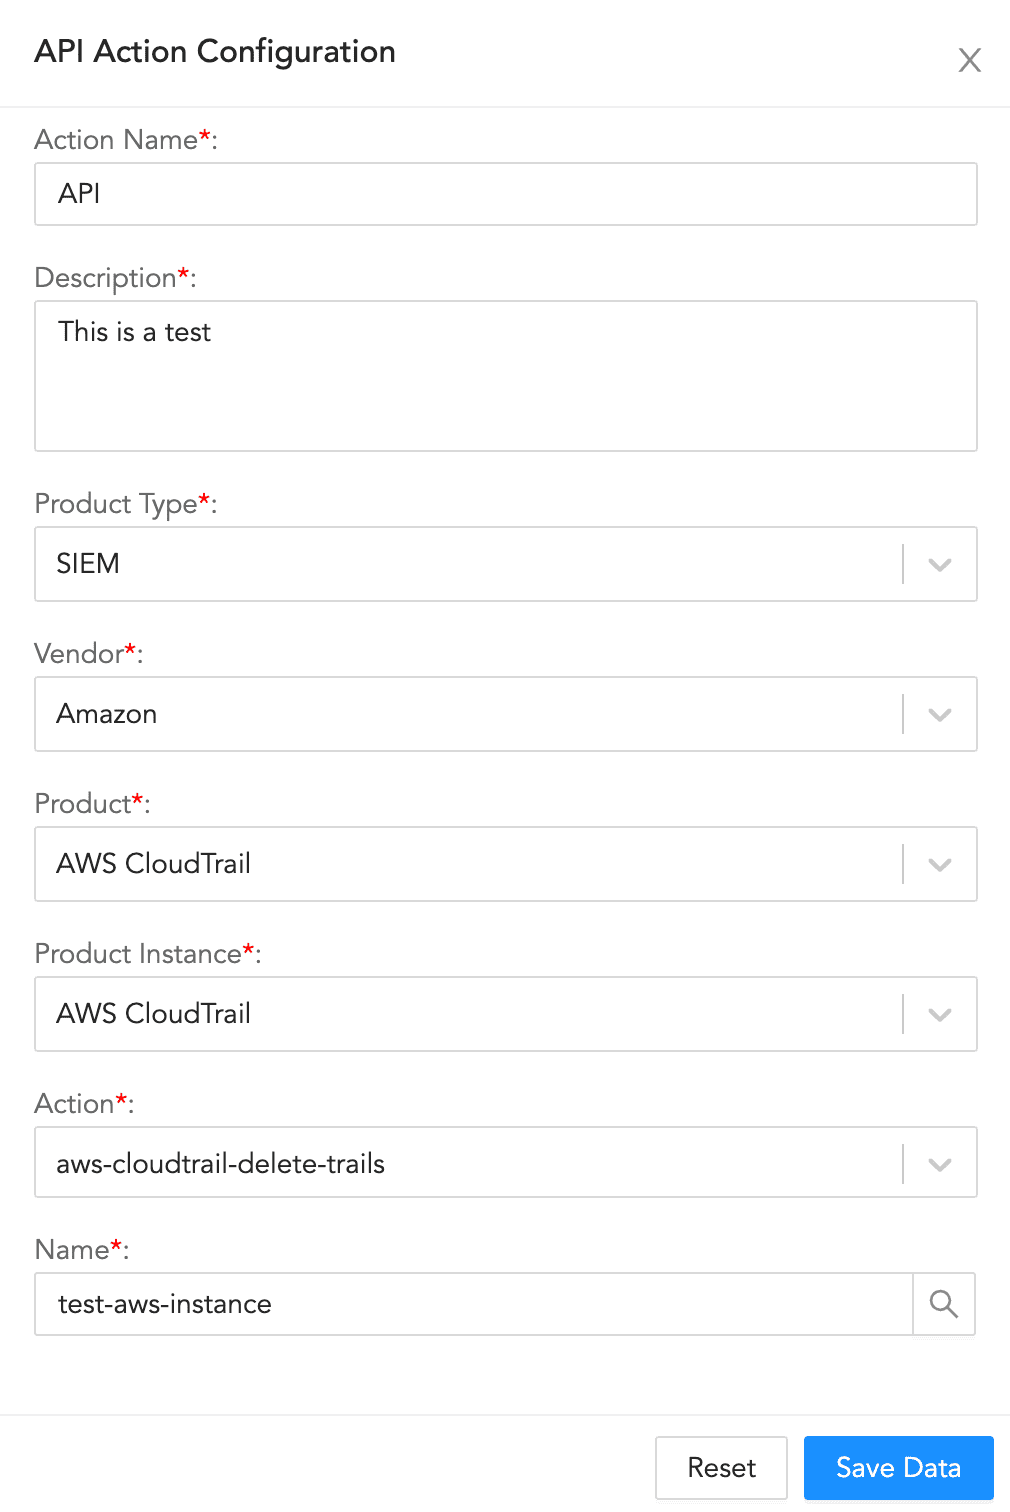
API |
Triggers an API call from within the playbook. |
Connects the playbook to products and services from other vendors. |
Script |
Triggers a script from within the playbook. Currently, Logpoint only supports Python scripts. |
Lets you write python scripts to customize playbook functionality. |
Case Item |
Adds an individual item or event to a case, the investigation’s sequence of steps. Refer to the Cases section for details. |
Let’s you and your colleagues track and understand what happened through the course of an automated incident investigation. |
Status |
Sets the status of an incident. |
Apply status to incidents based on severity. |
Sends an email from within the playbook. |
Send incident based email to desired recipients from within the playbooks. |
|
LDAP |
Triggers an LDAP request. |
Authenticates users/actions from within Playbooks by communicating with a central user database. |
Async Api |
Triggers an Asynchronous API call from the playbook. |
Connects the playbook to other vendors’ products and services via asynchronous API, and puts a playbook to sleep until it gets the response. |
To configure a playbook action:
Enter an Action Name and its Description.
Select a Playbook.
Enter the information for the playbook.
Click Save Data.
To configure an annotation action:
Enter an Action Name and its Description.
Enter an Annotation Text.
Click Save Data.
API Action Configuration
To configure an API action:
Enter an Action Name and its Description.
Select a Product Type, a Vendor, a Product, a Product Instance, and an Action.
Enter the information for the selected configuration.
Click Save Data.
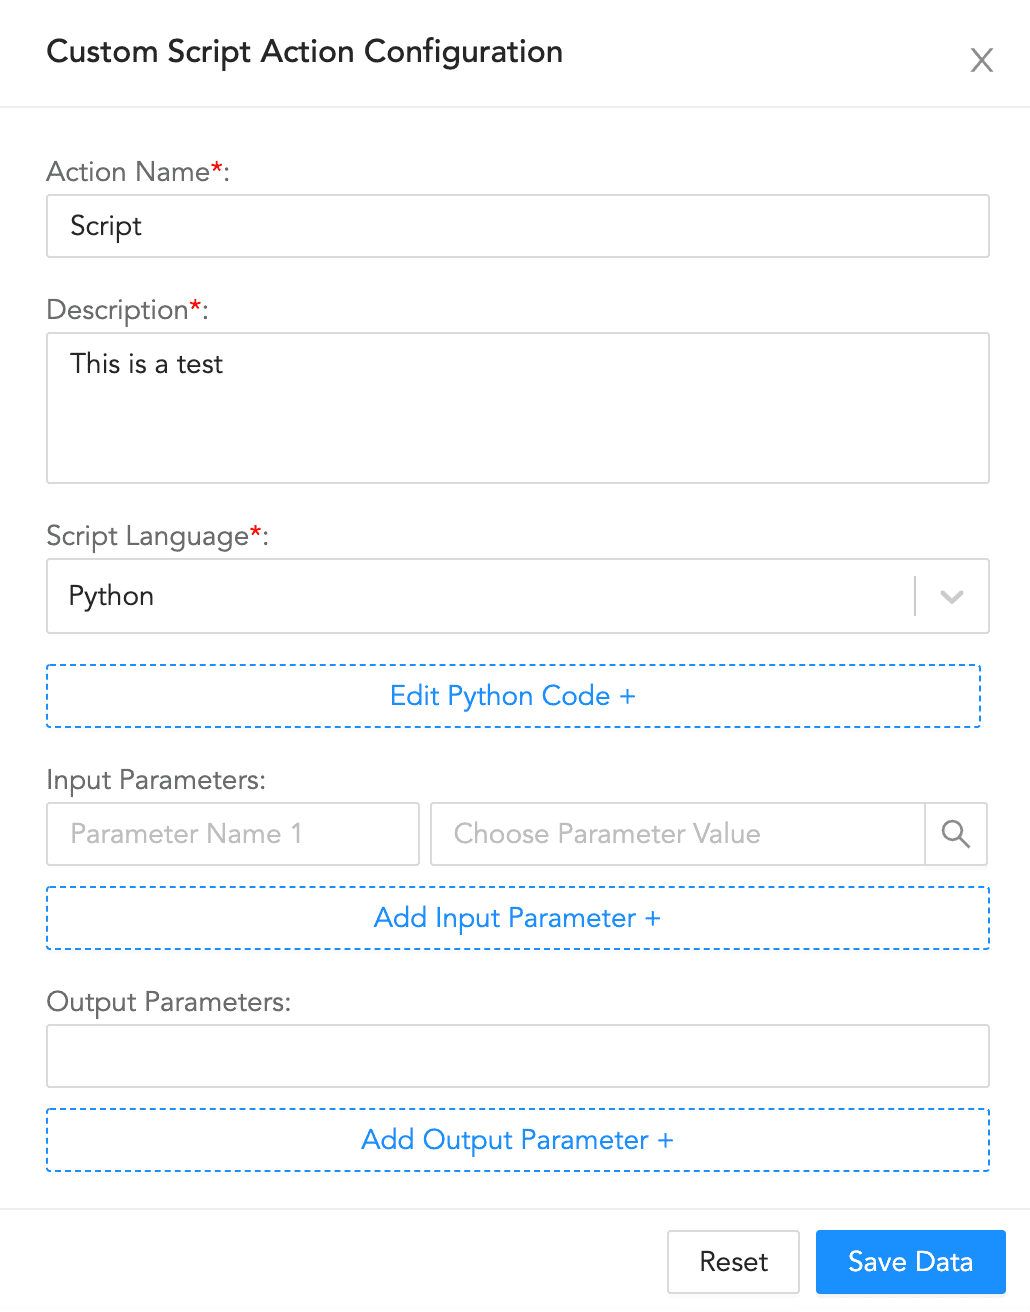
Script Action Configuration
To configure a script action:
Enter an Action Name and its Description.
Select the Script Language.
Click Edit Python Code +, enter the required code, and click Save.
Enter or select the Input Parameters and their values.
Enter the Output Parameters for the block.
Click Save Data.

Case Item Configuration
To configure a case item action:
Enter an Action Name and its Description.
Enter or select a Case Id.
Select a block Type.
If you choose Label, enter a Description and a Label.
If you choose File, enter a Description, a File Name, and a File Location.
If you choose Query Result, enter a Description, and a Query Result.
Click Save Data.
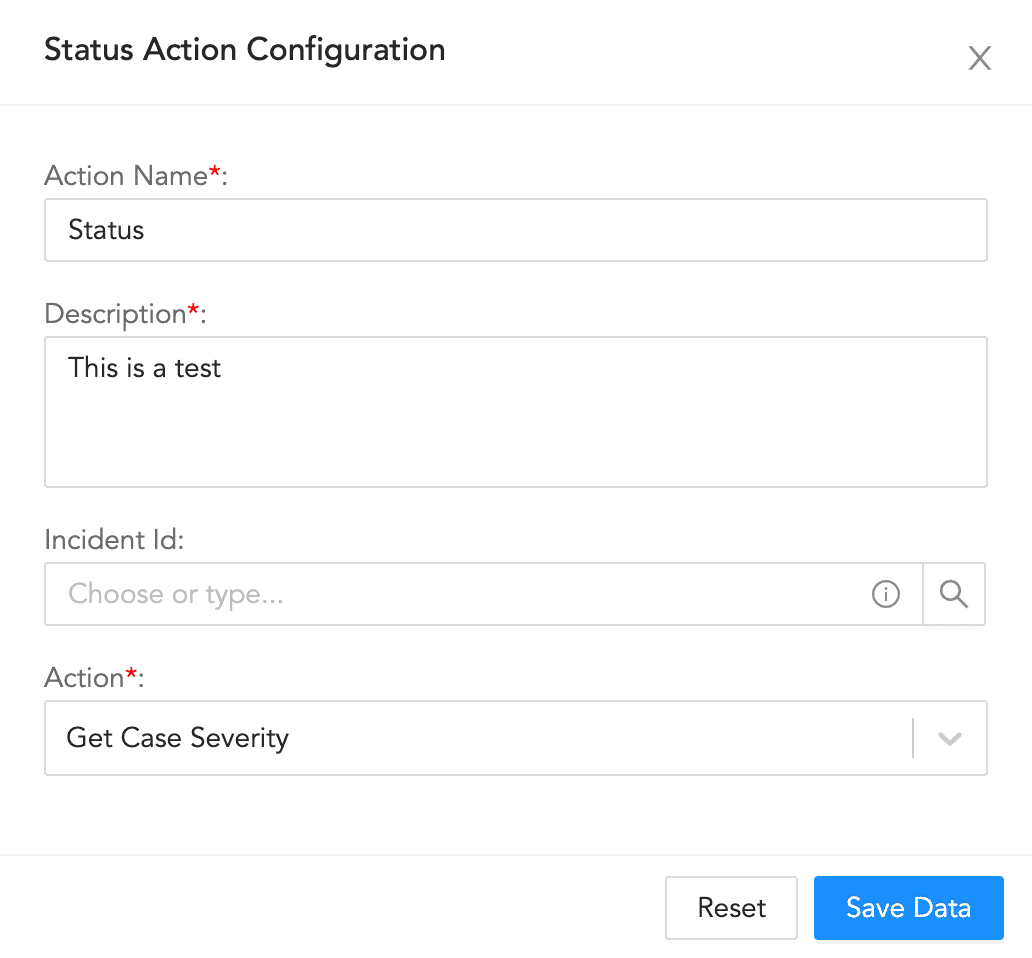
Status Action Configuration
To configure a status action:
Enter an Action Name and its Description.
Enter or select an Incident Id. You can leave the field blank to use a dynamically generated ID.
Select an Action.
If you select Set Case Status, select the Status.
If you select Handling Status, select the Case Status.
If you select Manage Case Severity, select the Severity Action Type and enter the Decrement Severity By value.
Click Save Data.
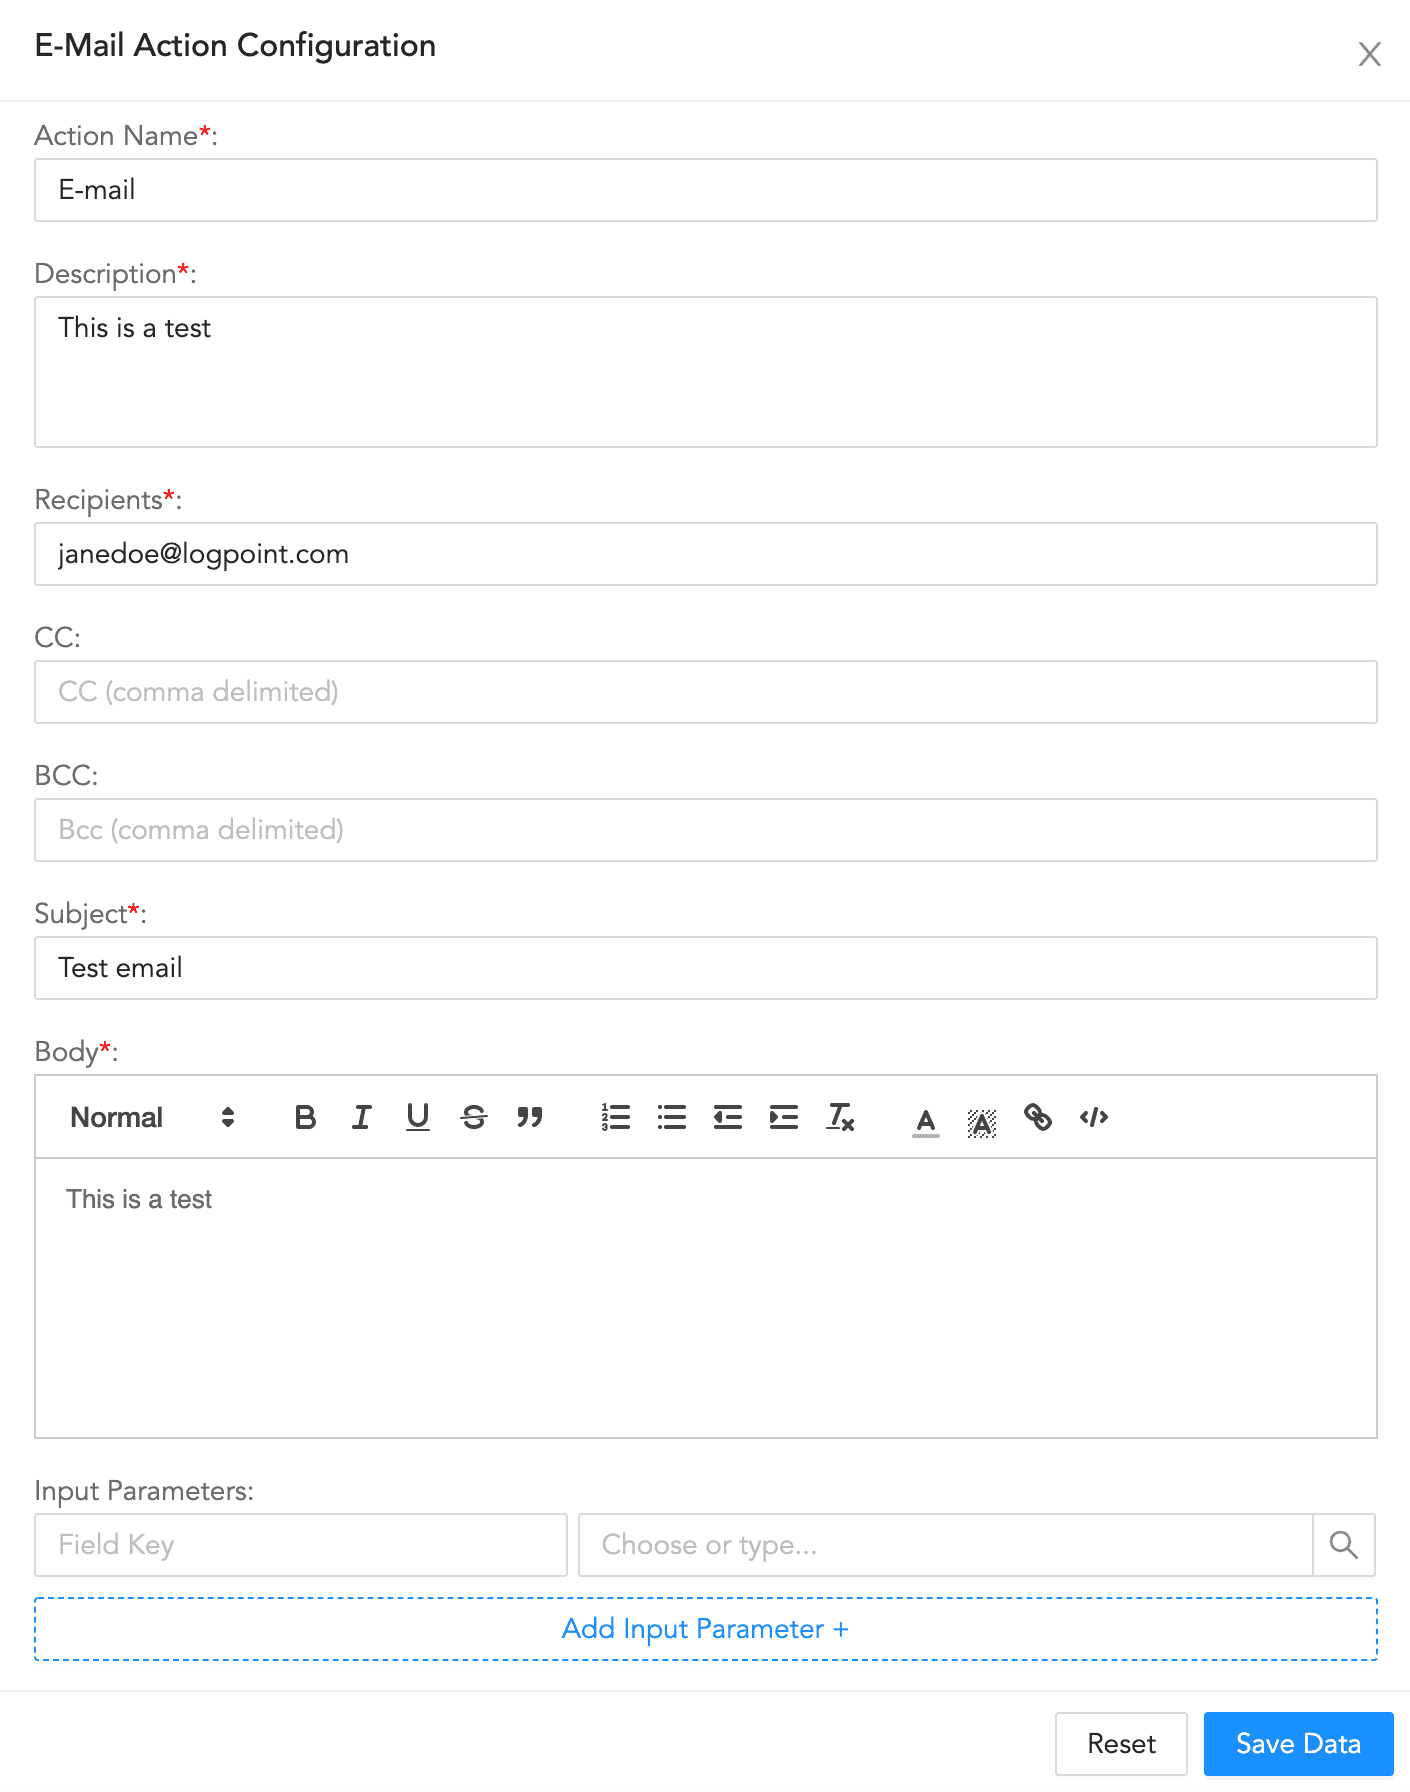
E-mail Action Configuration
To configure an e-mail action:
Enter an Action Name and its Description.
Enter a comma-separated list of Recipients, CC recipients, and BCC recipients.
Enter a Subject.
Enter the e-mail Body.
Enter a key-value separated list of Input Parameters.
Click Save Data.
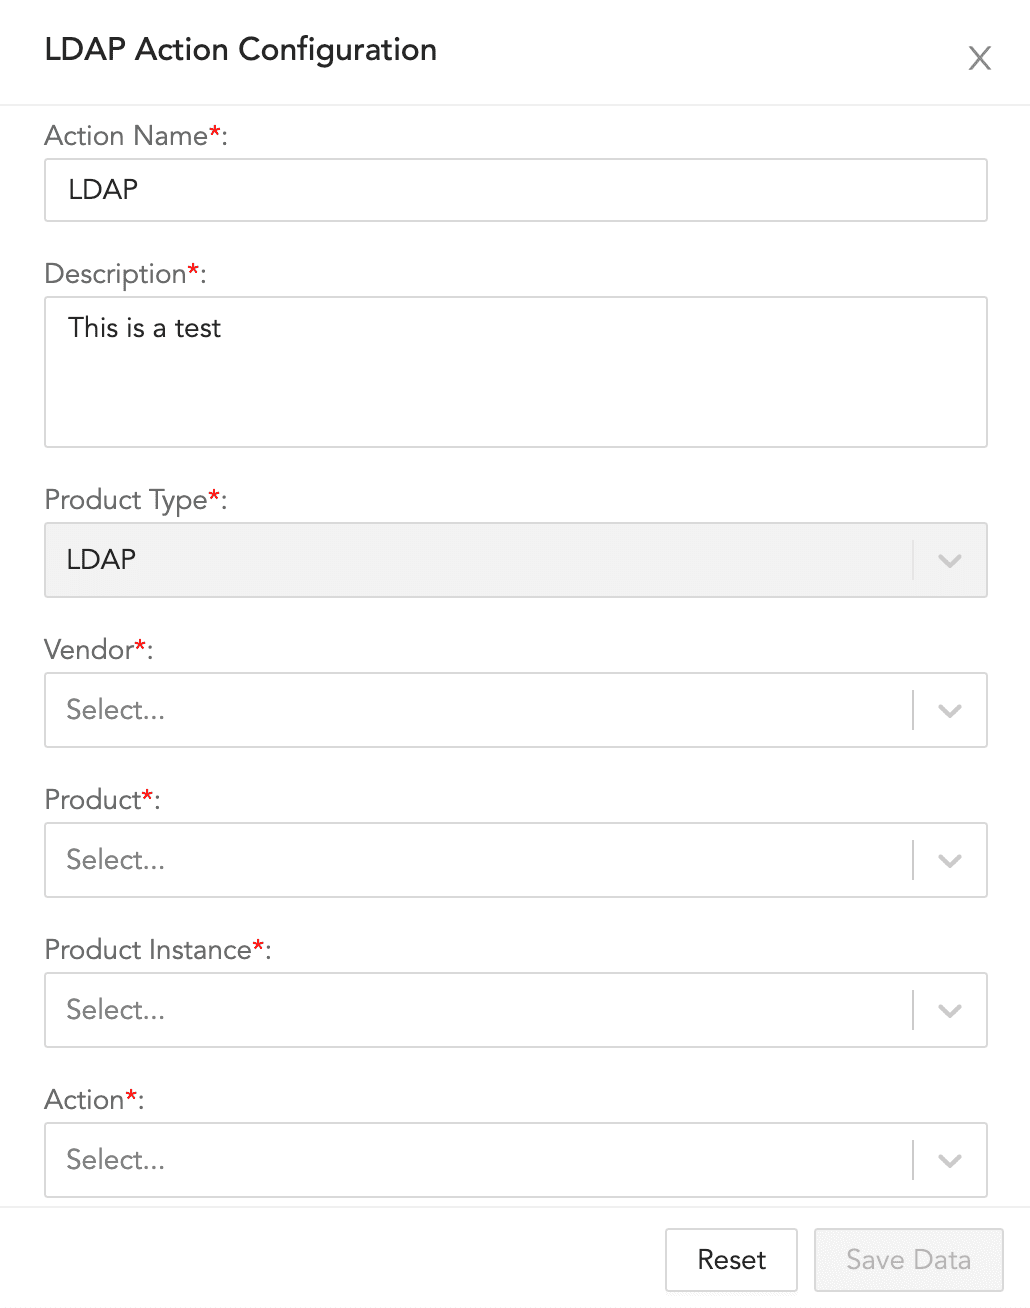
LDAP Action Configuration
To configure an LDAP action:
Enter an Action Name and its Description.
Select a Vendor, a Product, a Product Instance, and an Action.
Click Save Data.
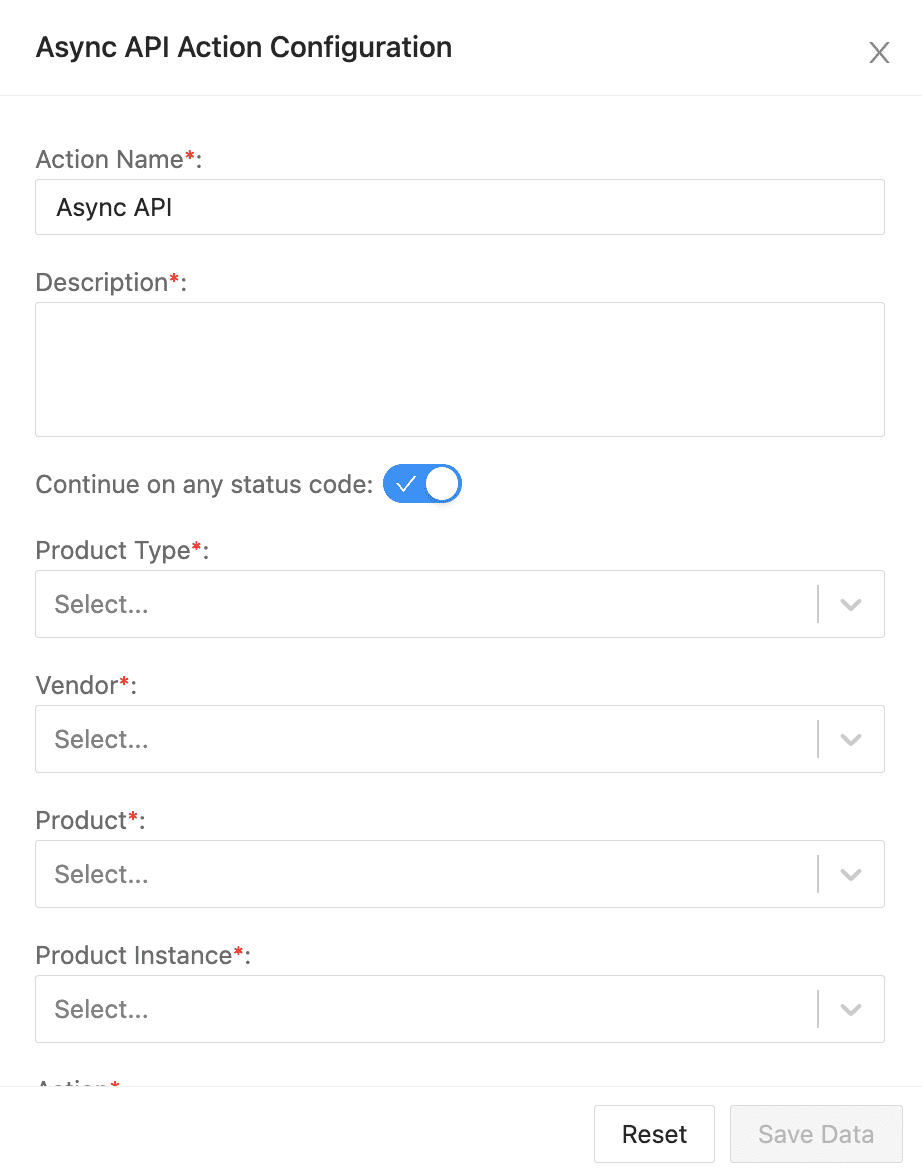
Async API Action Configuration
To configure an Async API action:
Enter an Action Name and its Description.
Enable Continue on any status code to continue running the Playbook on any response code.
Select a Product Type, a Vendor, a Product, a Product Instance, and an Action.
Enter the information for the selected configuration.
In Case Id, enter the ID of the case generated by the playbook.
Leave the default value for Callback Header Name as soar_callback_path.
In Callback Return Parameters, enter the parameters that stores the API’s response data that can be used by other actions blocks.
Enable Resume anyway if callback not invoked within a specific period to resume the playbook after the specified period, even if the API is waiting for the response.
Click Save Data.
UML Name |
Description |
When to Use/How to Use |
|---|---|---|
For Each |
Processes multiple queries from the same block. |
When you need to loop queries through each item in an array or list. |
If-Then |
Processes a conditional statement. |
When you need to make a specific response for a predefined event. |
Composite If |
Processes a complex conditional statement. |
When you need to add complex conditions and add OR and AND operators to conditional cases. |
Stop |
Stops the execution of the playbook |
When you need to terminate the playbook and set the specific status to it. |
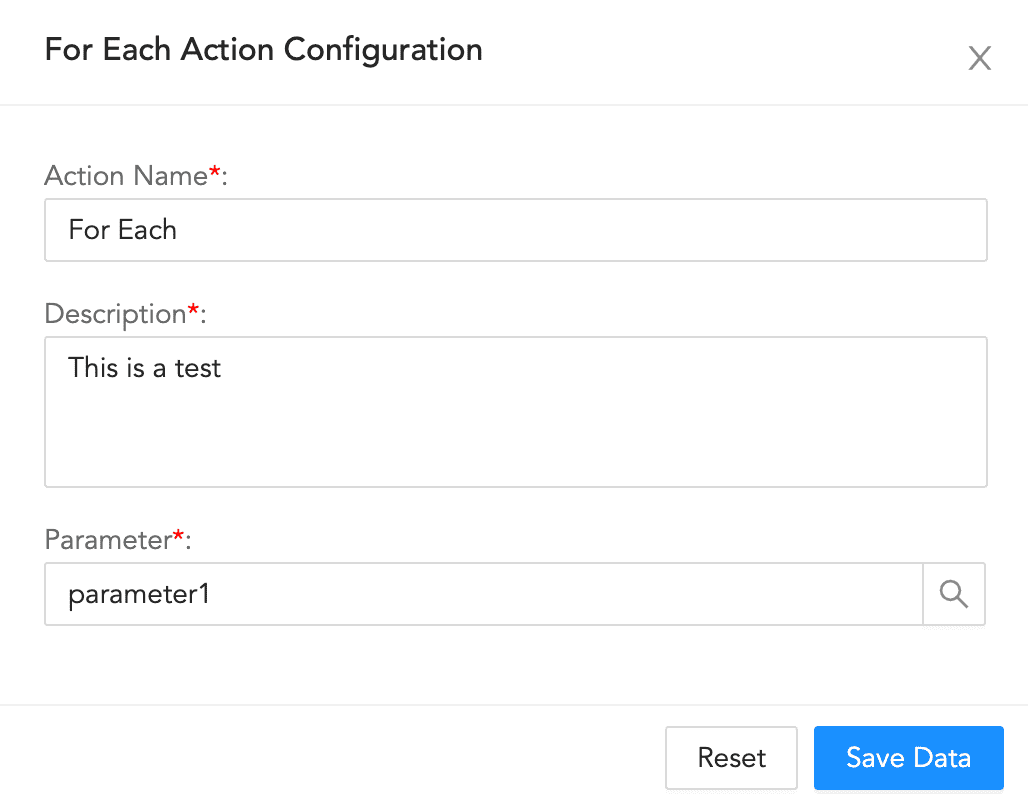
Enter an Action Name and its Description.
Enter or choose the Parameter.
Click Save Data.
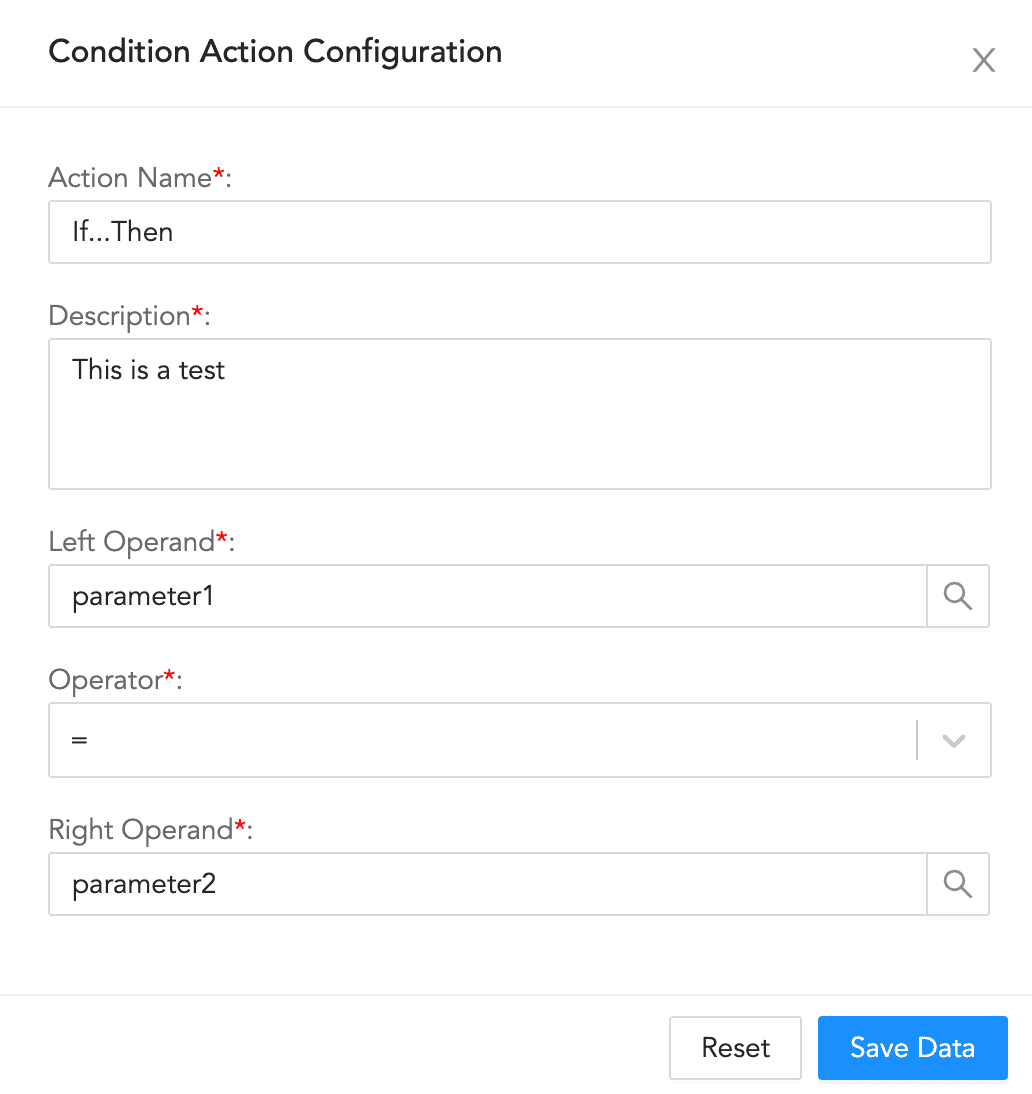
Enter an Action Name and its Description.
Enter or choose the Left Operand.
Select an Operator.
Enter or choose the Right Operand.
Click Save Data.
Note
Add another block to follow from the Else node when the provided condition is False.
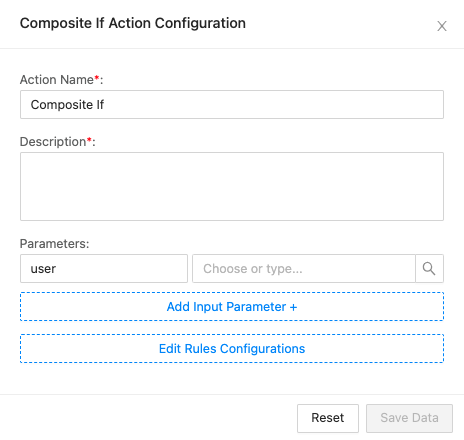
Enter an Action Name and its Description.
Enter or choose the Parameters. These parameters are used to configure the condition.
Click Edit Rules Configurations to add the condition. See the example below.
Example:
The image below displays a way to configure the condition email = bob@example.com OR (name = bob and domain = example.com).
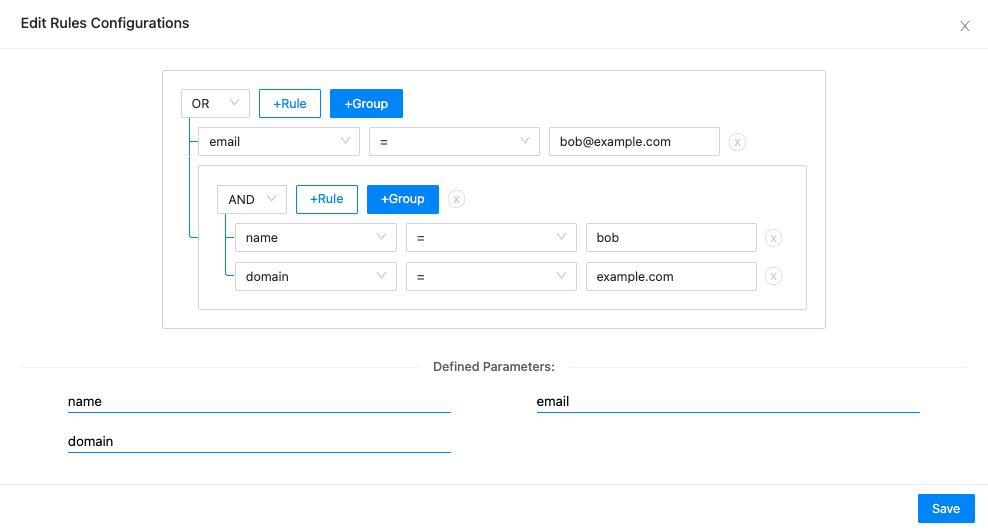
Composite If Example
Click Save Data.
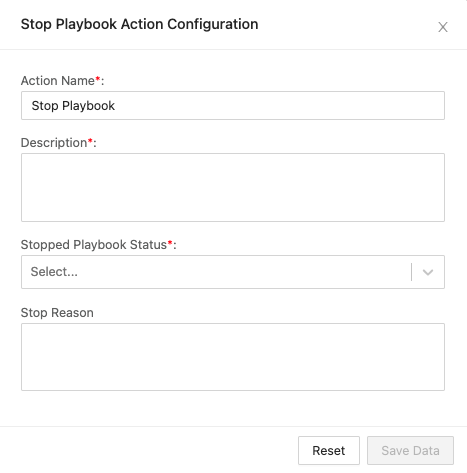
Enter an Action Name and its Description.
In Stopped Playbook Status, select a status. It will set the playbook’s status after it is stopped.
In Stop Reason, enter a reason for stopping the playbook.
Click Save Data.
Interactive Name |
Description |
When to Use/How to Use |
|---|---|---|
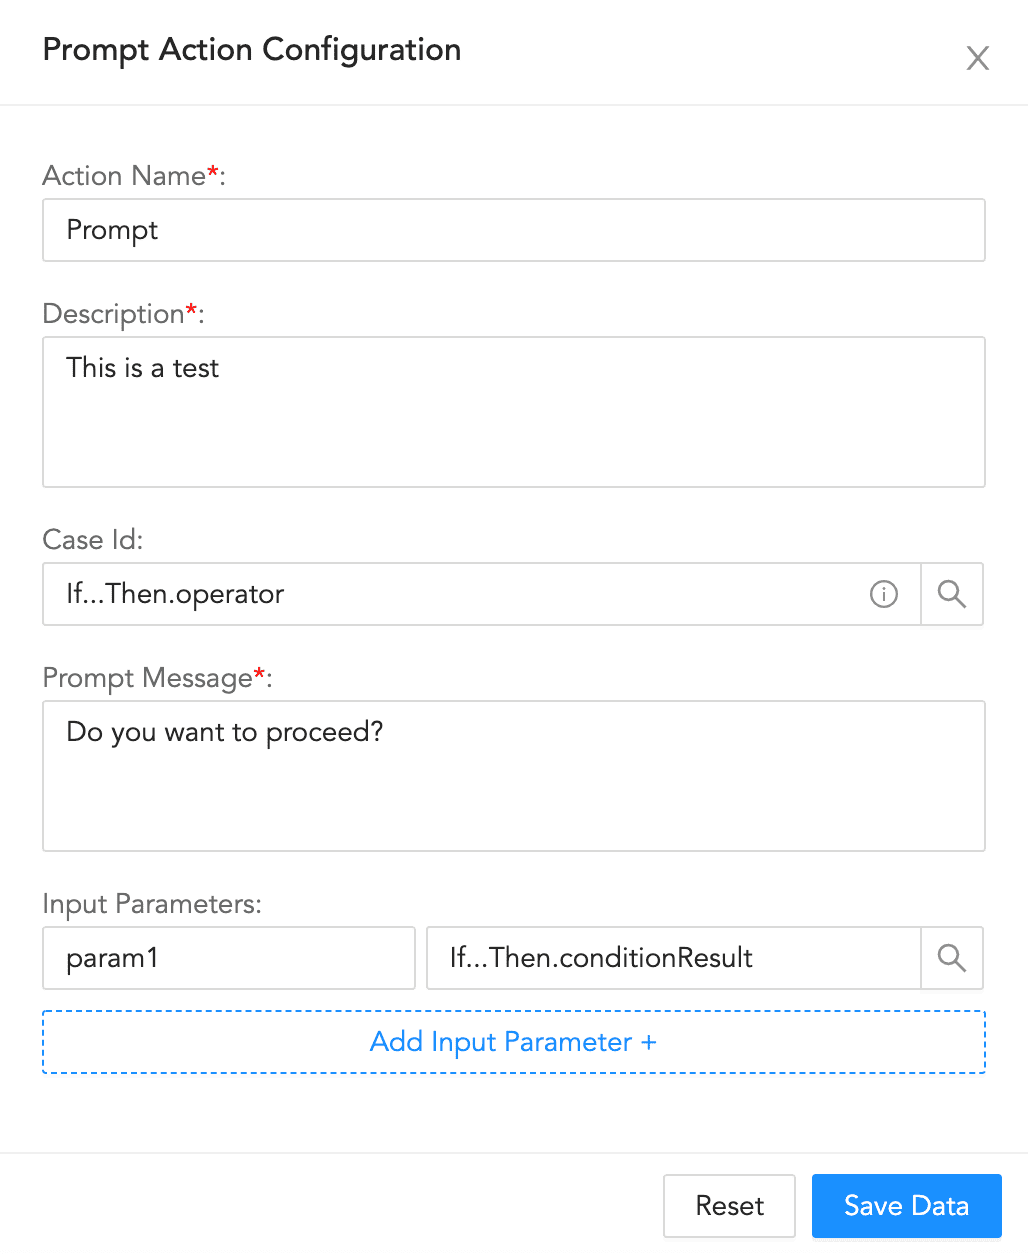
Prompt |
Displays a message for manual action on part of user before the playbook runs. |
When you want to confirm whether or not the user needs to perform certain manual actions before the rest of the automated playbook continues running. |
Action Block Name |
Description |
When to Use/How to Use |
|---|---|---|
Format |
Adds a block of parameters in the key-value format. |
When you need to add multiple parameters and associate each with various actions. |
Query |
Adds a query to get specific fields. |
When you need to input a query to generate output parameters based on input parameters. |
Filter |
Filters results using the input parameters. |
When you need to filter out results based on input conditions. |
Cases Query |
Searches for existing cases using filters. |
When you need to search and retrieve existing cases based on a specified filters. |
String Utilities |
Allows string manipulation on input text. |
When you need to perform different string manipulations, including lowercase/uppercase conversion and encoding/decoding to different formats. |
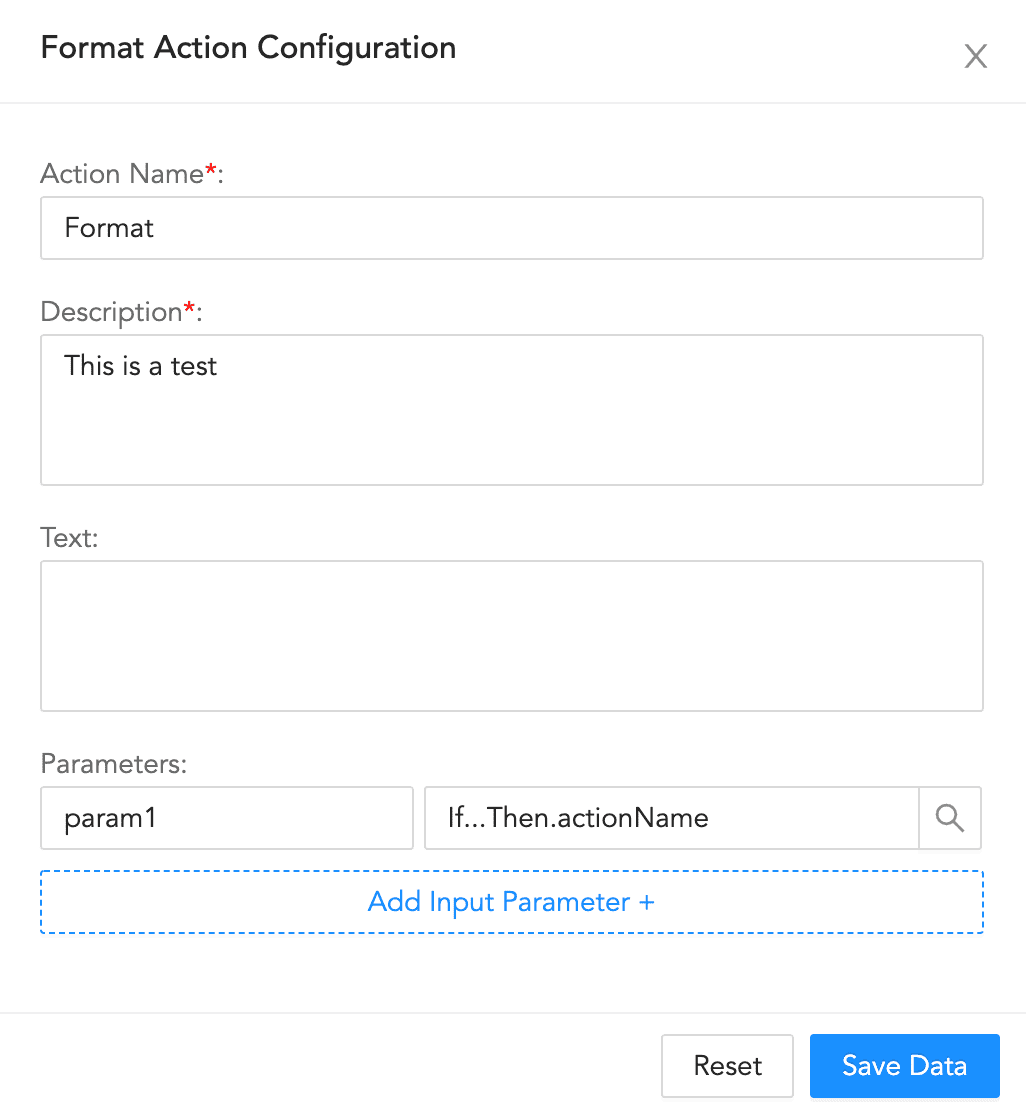
Format Action Configuration
To configure a format block:
Enter an Action Name and its Description.
Enter a Text.
Enter a list of key-value based Parameters.
Click Save Data.
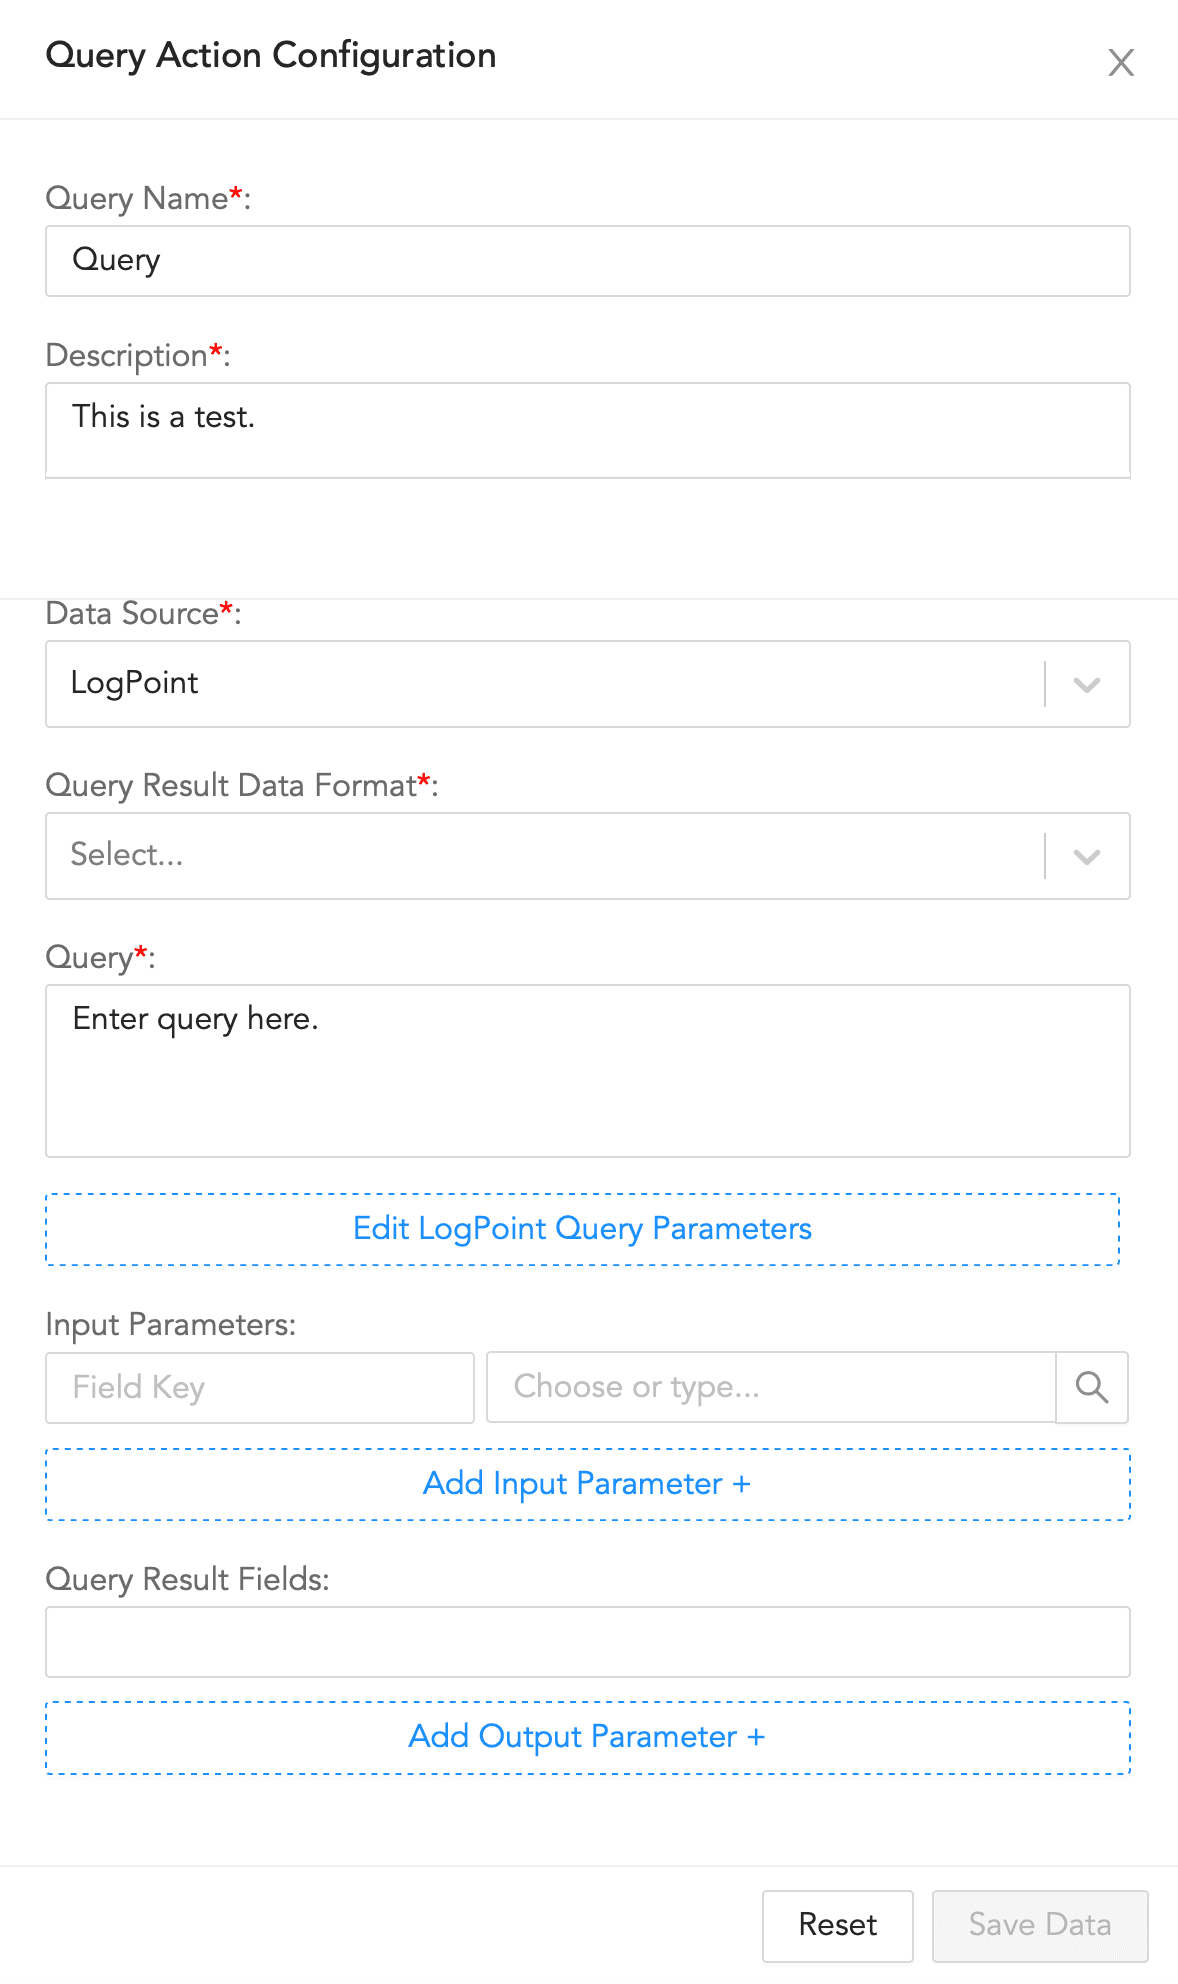
Query Action Configuration
To configure a query block:
Enter a Query Name and its Description.
Select a Data Source and a Query Result Data Format.
Enter a Query to retrieve the required logs.
Click Edit Logpoint Query Parameters to update the parameters.
4.1. Enter a Logpoint Id. The value entered here overrides the value retrieved from the Logpoint incident.
4.2. Select a Time Range and enter a Limit.
4.3. Select a Time-Zone. You can choose between a system set time zone and a custom time zone.
4.4. Enter a list of Repositories.
Enter a list of key-value based Input Parameters.
Enter a list of Query Result Fields.
Click Save Data.

Filter Action Configuration
To configure a filter block:
Enter an Action Name and its Description.
Enter or choose a Param.
Enter a JSONPath Filter Expression.
Click Save Data.
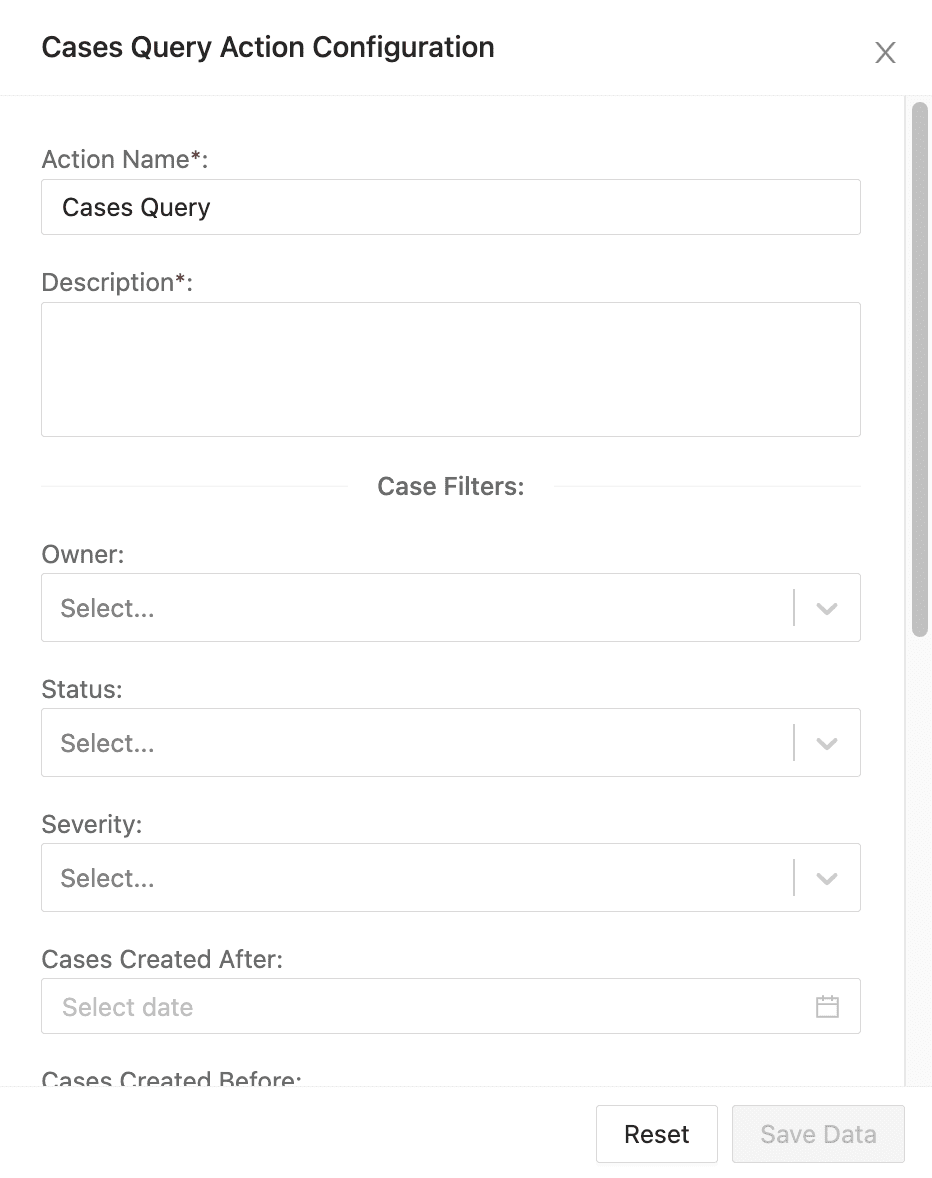
Cases Query Action Configuration
To configure cases query:
Enter an Action Name and its Description.
Choose the Case Filters you want to apply to retrieve cases according to:
Owner: The user who owns them.
Status: Their current status.
Severity: Their level of severity.
Cases Created After: When they were created after a specific date.
Cases Created Before: When they were created before a specific date.
Artifacts: Specific artifacts or artifact types linked to the case. You can use more than one artifact as a filter.

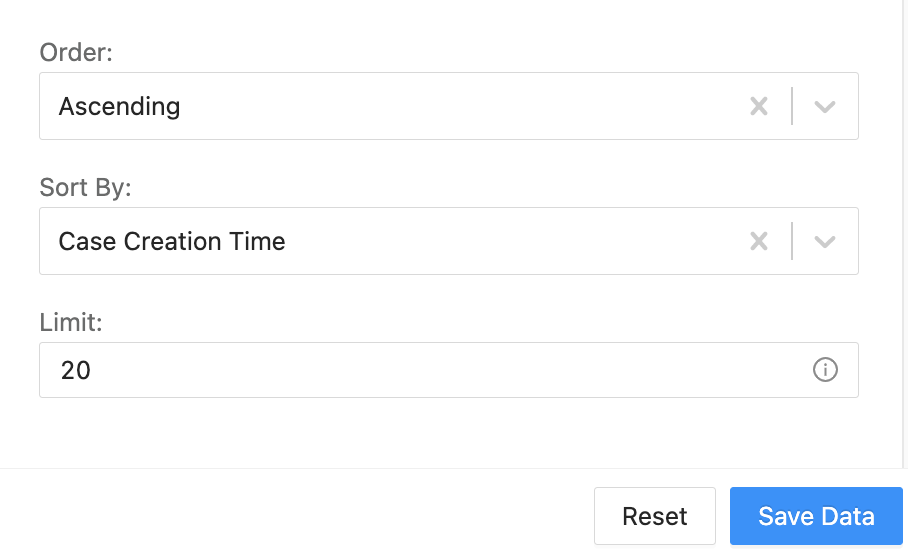
Cases Query Filters
- Select how the filtered results are displayed.
Order: Ascending or descending order.
Sort By: Group results according to Case Creation Time, Severity, or Case Status.
Limit: Total number of results. The maximum is 50.
Cases Query Order and Sorting
Click Save Data.
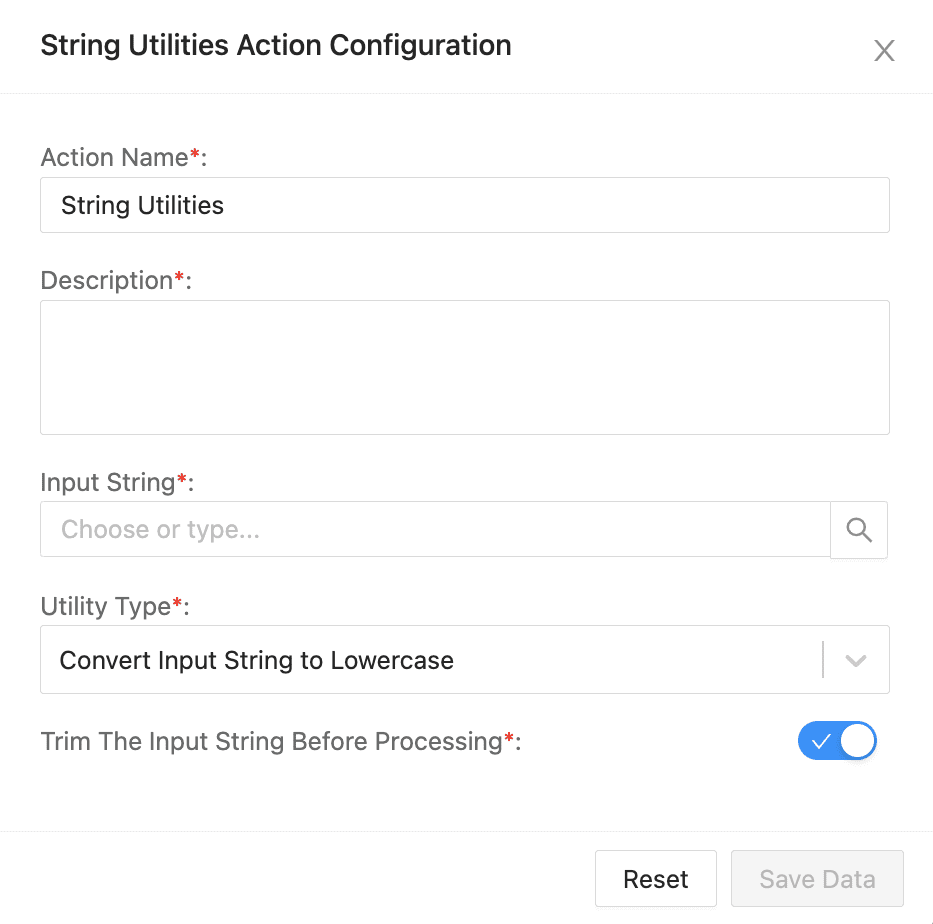
String Utilities Action Configuration
To configure string utilities:
Enter an Action Name and its Description.
Enter or select an Input String. When you start typing, you can choose one from the auto-fill parameters list.
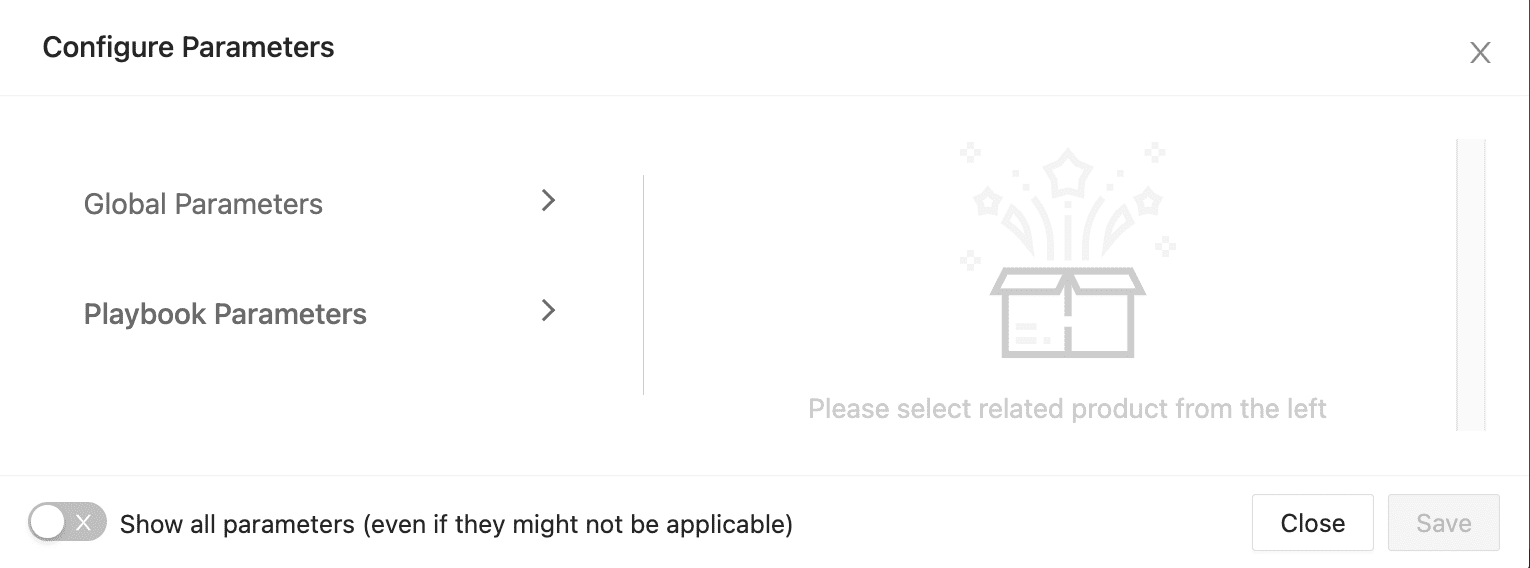
Configure Parameters
Select the Utility Type from the drop-down. The utility types are:
Convert Input String to Uppercase: It converts all input strings into uppercase. Numbers and special characters are not affected.
Convert Input String to Lowercase: It converts all input strings into lowercase. Numbers and special characters are not affected.
Remove Prefix / Suffix: It removes a substring from the prefix or suffix of the input string. You can select to remove the substring from the suffix, prefix, or both.
Calculate MD5: It calculates the MD5 sum of the input string.
Encode text as Base64: It encodes the input string into Base64 encoding.
Decode text as Base64: It decodes the input string using Base64 decoding. If the input is not Base64 encoded, the action won’t work.
Encode text as URL: It encodes the input string to be used safely in a URL.
Decode text as URL: It decodes the previously URL-encoded string. If the input is not URL-encoded, it returns the input text as output.
Escape text as JSON: It escapes the input string such so it can be used inside a JSON document.
Unescape text as JSON: It removes the applied JSON escape characters from the input string.
Regular Expression: It uses the regex string to search and returns results from the input. Selecting the Get Only First Match returns the first string. When it’s deselected it returns all matches in JSON format.
Replace a Substring of the Input String: It replaces a part of the input string with a different string.
Remove Whitespaces from Prefix and Suffix: It removes whitespaces from the start and the end of the input string.
Enable Input Trimming to remove the whitespaces from the prefix and suffix of the input string.
Click Save Data.